
Most beginner photographers are initially not sure which basic camera settings to use. they are overwhelmed by the endless buttons and menu functions on their cameras. This guide to basic camera settings will help beginner understand how to operate camera.
Table of Contents
The beginner’s guide to basic camera settings
Being able to capture great visuals requires a little bit of an introduction to the three most basic camera settings: Aperture, ISO, and Shutter Speed.
The combination of these three functions is present in most cameras and is imperative to operating your camera. We will go into greater detail about aperture, ISO, and the shutter speed in this article.

The extra features and camera modes vary from camera to camera, but we will go over the most common camera modes in digital cameras, including Auto Mode, Manual Mode, Aperture Priority, and Shutter Speed Priority.
Knowing all of these basic camera settings and modes is the key to know your camera better.
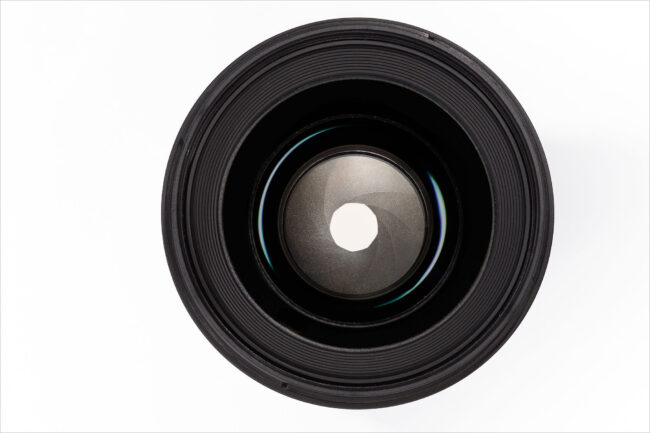
What is Aperture?
Aperture is one of the three pillars of photography (the other two being Shutter Speed and ISO), and certainly the most important. In other words Aperture is one of the three elements that build up the exposure besides the shutter speed and the ISO.

Aperture refers to the opening of a lens’s diaphragm through which light passes. It is calibrated in f/stops and is generally written as numbers such as 1.4, 2, 2.8, 4, 5.6, 8, 11 and 16. Lower f/stops give more exposure because they represent the larger apertures, while the higher f/stops give less exposure because they represent smaller apertures.
This may seem a little contradictory at first but will become clearer as you take pictures at varying f/stops. Be sure to check your manual first to learn how to set Aperture Priority for your camera, then try experimenting to get comfortable with changing the aperture and recognizing the effects different apertures will have on the end-result image.

So what does this mean? Aperture is a powerful setting that allows you to easily manipulate light in your photos. You can brighten up your photos by opening your aperture (smaller f-stop) or minimizing light entering the sensor by increasing your f-stop.

What is ISO?
ISO, which stands for “International Organization for Standardization” is one of the three pillars of photography (the other two being shutter speed and aperture), and it has a major effect on your images.
In very basic terms, ISO is simply a camera setting that will brighten or darken a photo. As you increase your ISO number, your photos will grow progressively brighter. For that reason, ISO can help you capture images in darker environments, or be more flexible about your aperture and shutter speed settings.

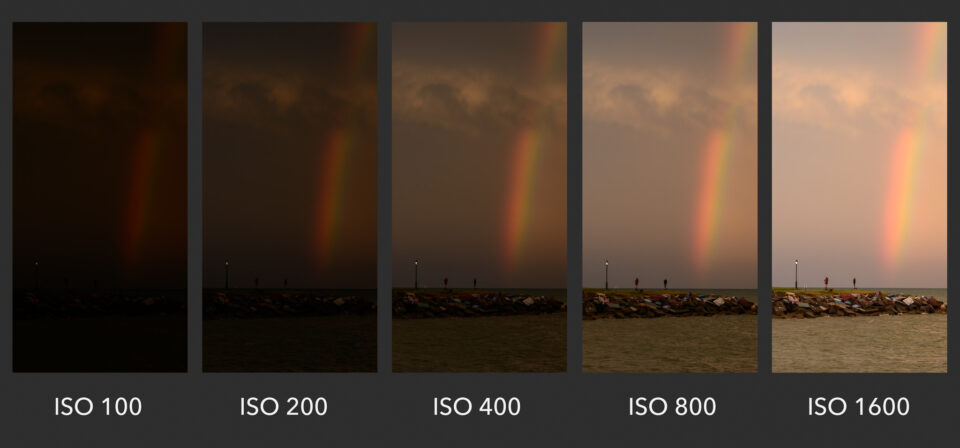
Common ISO Values
Every camera has a different range of ISO values (sometimes called ISO speeds) that you can use. A common set is as follows:
- ISO 100 (low ISO)
- ISO 200
- ISO 400
- ISO 800
- ISO 1600
- ISO 3200
- ISO 6400 (high ISO)
Quite simply, when you double your ISO speed, you are doubling the brightness of the photo. So, a photo at ISO 400 will be twice brighter than ISO 200, which will be twice brighter than ISO 100.
What is Shutter Speed?
One of the three most important settings in photography is Shutter Speed, the other two being Aperture and ISO.

Shutter speed is responsible for two particular things: changing the brightness of your photo, and creating dramatic effects by either freezing action or blurring motion.
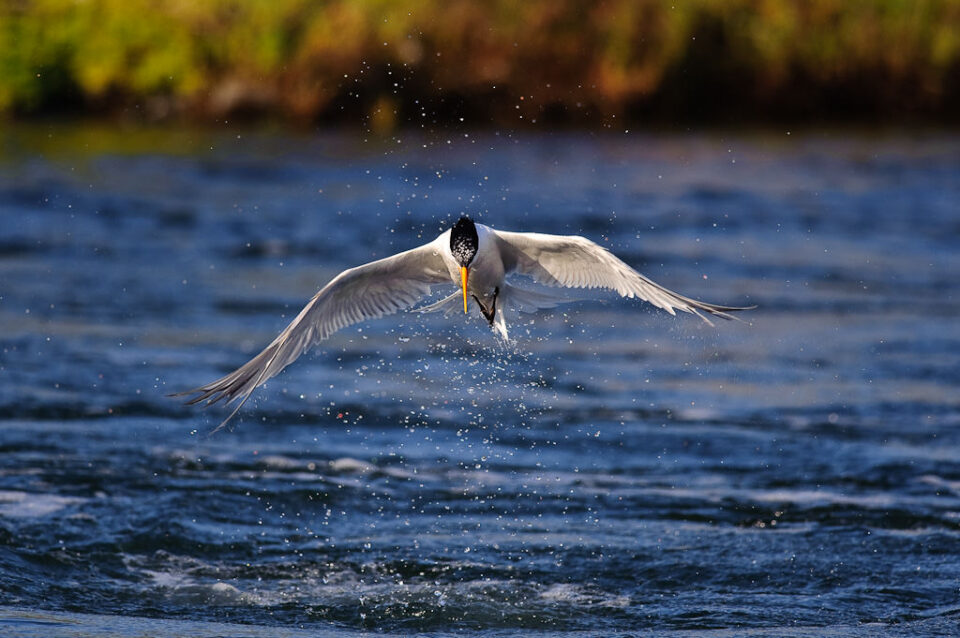
Shutter speed is the length of time camera shutter is open, exposing light onto the camera sensor. Essentially, it’s how long your camera spends taking a photo. This has a few important effects in how your images will appear.

Pick the Best Aperture, Shutter Speed and ISO Settings
Auto Mode
Most digital cameras nowadays will have Auto Mode where the camera will control every aspect of the photograph, including the aperture, focus, shutter speed, and more. The photographer won’t be able to control the settings much in this setting.
In many circumstances, using Auto Mode is a very quick and easy option. Beginners will gravitate toward Auto Mode to get a feel for the camera without worrying too much about the controls. While this is perfectly normal, it may limit you from using the camera’s fullest capabilities.
It’s recommended that you use Auto Mode when the lighting is ideal so the camera can detect the proper settings and exposure automatically.
Manual Mode
Manual Mode allows you to take full creative control of your camera and photos. using Manual Mode is an excellent way to improve your photography skills.
Using Manual Mode requires you to specify each setting, which can come in handy when the lighting isn’t ideal or if you are capturing images for artistic reasons. Some of the most experienced photographers shoot in Manual Mode for the reason that they can take full creative control. You can easily achieve creamy bokeh in your background by manually adjusting your aperture, or create stunning images of star trails with a long shutter speed.
Aperture Priority
If your camera has Aperture Priority mode, then you’re in luck. Being able to manually control the aperture is a great way to control the depth of field of an image.
In this mode, the photographer only controls the aperture value, and the camera controls the rest (shutter speed and ISO value). Sometimes you can also control the ISO value and the camera will choose the proper shutter speed automatically.
Aperture Priority mode is a popular favorite among photographers because you can control how much of the image is in sharp focus.
Shutter Speed Priority
Shutter Speed Priority allows you to fully focus on the shutter speed. Like we talked about above, shutter speed is the amount of time the shutter remains open for light to enter the sensor. The faster the shutter speed, the less the light is entering the sensor. Slower shutter speeds allow more light in, and your images will come out brighter.
Using your camera’s shutter priority mode (“TV” on Canon, “S” on Nikon) is a great way to gain an understanding of the effect different shutter speeds can have on your images. Shutter priority mode allows you to select the shutter speed you want while the camera figures out the ISO and aperture for a proper exposure. Spend some time playing with the shutter priority mode to see what happens to your images when you speed up or slow down the shutter speed.


